9 Week Projects
How I made my Nine weeks Project
1. I saved a Degas painting image to my computer and opened Photoshop
2. I went to the file dropdown menu at the top and selected open and selected the photo I had just saved
3. I then went back to google and got an image of a dalek, cyberman and a Tardis
4. I opened each in photoshop [refer to above directions for doing so]
5. I got the magic eraser tool which is on the tool bar to the left and can be found by right clicking on the normal eraser tool
6. then I clicked on everything except the dalek
7. Then used the rectangular marquee tool to put a box around the dalek (marque tool is the second box in the toolbar on the left)
8. then I went to edit and hit “define brush preset” and hit ok
9. I did that with all three images
10. then I went back to the degas image and used the brush tool which is also on the left toolbar and selected which brush I want which is on the top tool bar
11. I then went to the window drop down menu and checked timeline and hit the create video timeline button in the middle
12. then towards the bottom there are three little squarish looking things and I clicked on them
13. then the button to create new frames looks like a paper with the left bottom corner dog-eared
14. I created about five slides and I moved the dalek on each frame to make it look like he was going across the floor and I put the tardis in consecutive frames to make it look like it was flying by the window
15. To create a timeline you just make different layers visible in different frames
16. After I had done that I changed the time lapse of each frame to about half a second
17. Then I hit play but the movement of the figures were a little choppy so I tweened them by hitting the tween button under the frames which looks sort of like a ball being thrown
18. When you hit the tween button it asks you how many frames you’d like to insert and I did about three between each original frame
19. Denique exertus finitur
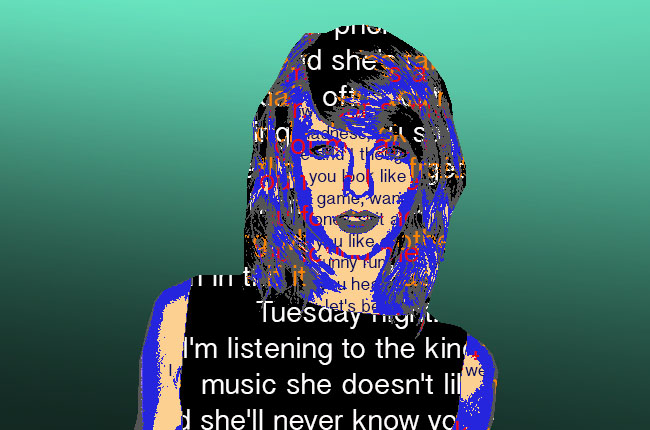
- I opened photoshop
- I got an image of taylor swift from the internet and opened it in photoshop (see last project on how to do that)
- I got the pen tool which is on the left tool bar and looks like an old fountain pen
- With the pen tool I clicked along the outside of her figure and went all the way around
- I went up above and hit the button that said “make selection”
- then when the selection was made and the dancing ants appeared I hit ctrl+X and the ctrl+V
- I went to the edit drop down menu and hit fill and selected the color I wanted
- I went back the the cutout image of Taylor and went to the image drop down menu and went to adjustments and towards the=e bottom it says desaturate which is what I did
- I went back to image-> adjustments and hit posterize this time and picked four levels
- I then staying on that layer went to the select dropdown menu and hit color range and using the eyedropper tool that shows up I clicked on the white part of the image
- then hit okay and this caused that part to be surrounded by dancing ants and I hit ctrl+J
- I did this with each of the four colors (white, light grey, dark grey, and black)
- after that was done I hid all layers except the top one, which is done by hitting the eyeball looking things next to each layer shown in the layer window
- I made a textbook over that layer by using the textbox tool that looks like a T in the left bar and pasted taylor swift lyrics into it and centered them and made them about a 9 pt size
- Then I went to the layer dropdown menu and hit “create clipping mask”
- I hid both those layers and did the same thing with the light grey layer
- and the dark grey layer
- and the black layer
- then I unhid all the layers and decide I didn’t like the way it looked so I changed the color of the text
- then I went to each layer with the color selection of her face i.e. the white layer and used the magic section tool [again left toolbar] and went to the edit drop down menu and fill and picked different colors
- Lastly i got the gradient tool [pretty sure by now you can guess where it is (hint: right click on the paint bucket tool)] and put a neutral density gradient on the whole thing
- I flattened the image
- Voila. fini.
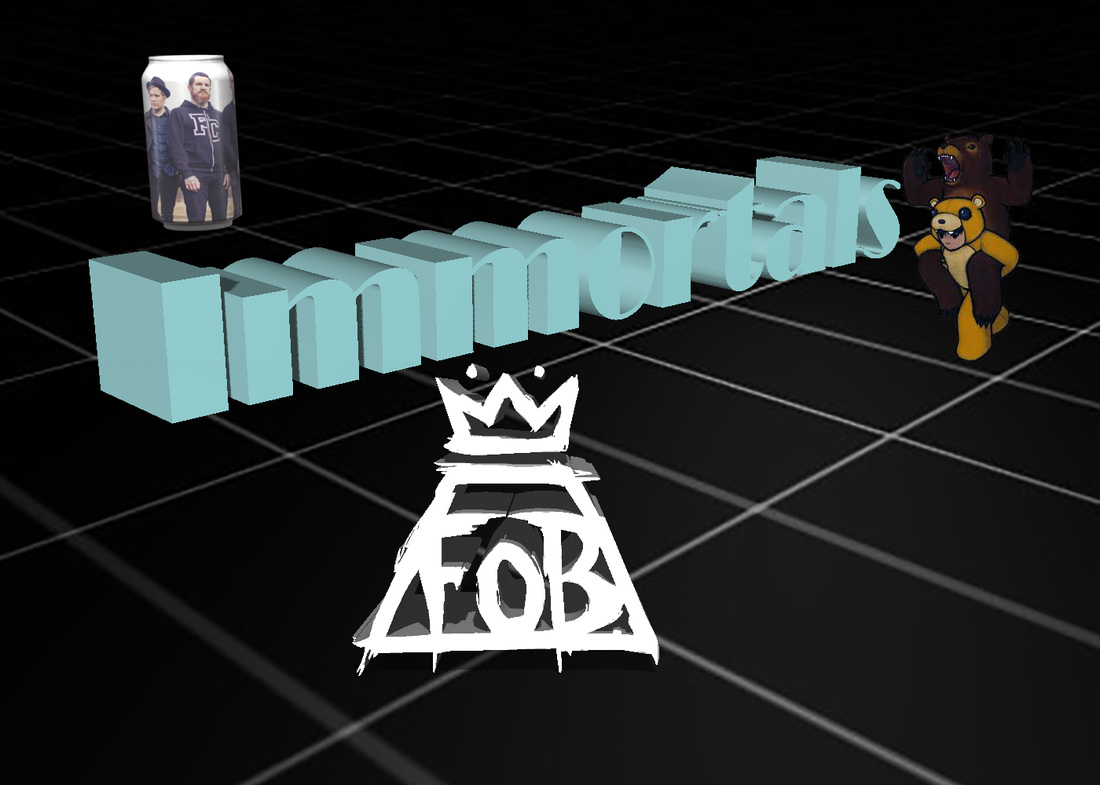
- Open photoshop
- change workspace to 3D by going to the windows tab up top and going to workspace
- create a text box and type in word then go to layer and hit 3D extrusion and hit create
- I moved the word to where I wanted using the move widget
- I went to diffuse and changed the material color of the text
- I added the image from the album Folie à deux and put it in the image in front of the "s"
- I then added the band logo making an extrusion from that as well
- I then looked at the image like it would if it were a jpeg and I decided I didn't like the way there was such a lack of perspective though I think about it now and I might be able to change that with a neutral density gradient overlay
- I found an image to use for the background that helped give it perspective depth
- I then decided that it was still a little simple so I made a soda can using the mesh preset
- I moved the can to where I wanted using the x, y, and z axis
- I then went to the label diffuse area and replaced the texture with a more recent image of the band
- Euge! Consummatum est
- First I found an image of the interior of the home( I tried to find the one from dr. who but I couldn't)
- I opened it in photoshop and used the 3D workspace
- I made a cube wrap using the mesh presets moved it accordingly
- I duplicated the object six times and moved the new objects aboiut the room using the x y and z axis tools ]
- I then saved the image as a jpeg and reopened it in photoshop
- I cut out all the boxes to a different layer and created a new video timeline
- I copied the layers with the boxes about 15 times and with each new frame I moved and made them visible accordingly
